Table of Contents
When it comes to cross-country skiing, ski bindings are one of the most significant part of mastering your sport. In order to gain full control over your expensive skis, you must learn how to operate it. Ski bindings are the mode of communication and interaction between the user and the ski, without which it is quite impossible to gain full control over it. To exert control over the twists and turns of your machine and experience the thrill of skiing to its utmost extent, it is necessary to get yourself a good cross-country ski binding.
Even after getting your hands on a good ski binding, learning how to mount it yourself could be a bit of a hassle. Depending on the type of boots you have, different cross-country ski bindings serve different purposes. It is advised to be extremely cautious of the ski bindings you get yourself to prevent the possibility of ugly accidents.
Having developed a newfound love for cross-country skiing, beginner XC skiers tend to struggle with mounting their ski bindings by themselves. NNN, SNS, and 3-pin/75 mm bindings are the most popular types of bindings among Nordic skiers for their efficiency and high quality.
Read along this article to learn how you can mount your cross-country ski bindings.
What You Will Need
Starting off with the basics, listed below are all of the things you will need to mount your cross-country ski bindings.
Generic Ski Binding Mounting Jig
[that you can use for NNN, SNS, 3 pin/75mm bindings] Several ski binding mounting jigs have taken the ski market by storm. These brilliantly designed and well-constructed mounting jigs are just what you need to master the act of binding cross-country skis. Created for the sole purpose of helping the skier conquer the world of mounting and binding, these ski binding mounting jigs sure do come in handy when you are struggling with binding your ski.
Something to Find the Balance Point With
[a thin, rigid object] Locating the balance point of a skii is an extremely important step in mounting your ski bindings. A thin, rigid object such as a screwdriver or a pencil attached to a piece of plastic card, but even your scraper blade works just fine. Make sure it is capable of balancing your skis.Drill
A good-quality drill is needed to drill holes into the mounting plates and keep the binding in place.
Hot Glue
Hot glue is required to fill in the drilled holes before proceeding with any other step while installing your cross-country bindings.
Screws
Screws are needed to finalize the process of installing the cross-country binding so that you are all ready to go out and ski your heart out.
How to Install Cross-Country Ski Bindings On My Own?
Now to get on with learning how to install cross-country ski bindings all by yourself, we have summarized all you need to do in the following steps.
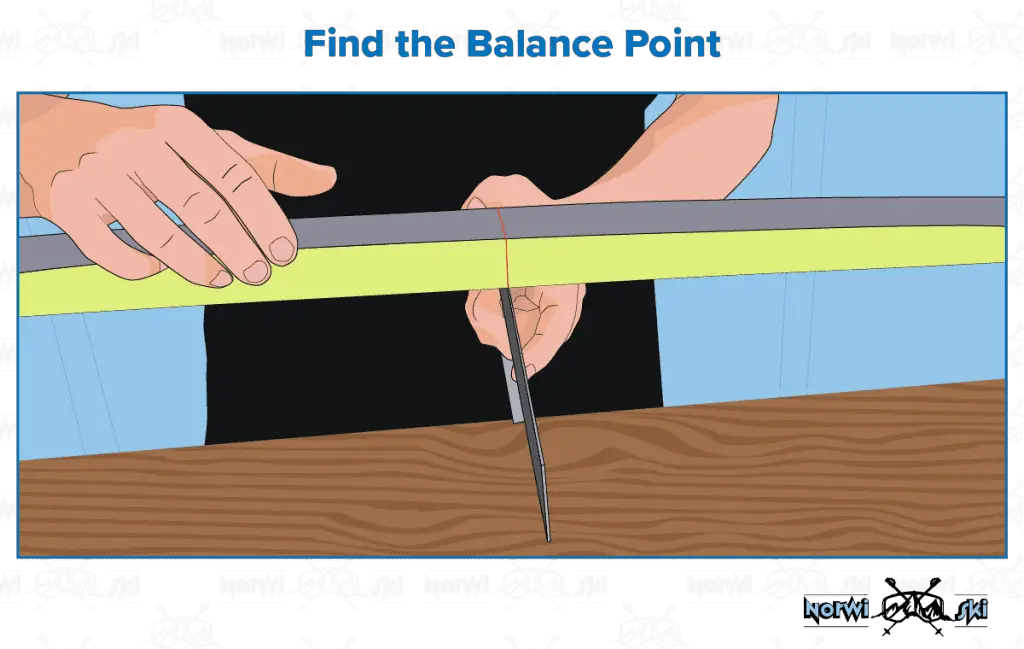
Find the Balance Point
The foremost step to install cross-country ski bindings on your own is to accurately locate the correct position of the balance point. The balance point is crucially important while mounting your skis. You would need a thin object, such as a pencil taped to plastic card or your scraper blade. Next, you would have to balance your ski onto your chosen object. The point at which the ski stops moving altogether and shows stability would be your balance point.
Mark the Balance Point
Marking the balance point is necessary for the placement of your ski binding mounting jig. Pick up a brightly colored marker and mark the balance point vertically in a straight line. If your ski is of a darker shade, using masking tape before marking the location of the balance point is highly advisable.
Lining Up the Jig
A generic ski mounting jig has different alignment positions for the type of ski system you have, whether that be NNN, SNS, or 3 pin/75mm binding system. Different positions on the jig indicating the type of system you have is to be aligned with the balance position accordingly.

Make sure all the other points on the jig are lined up.
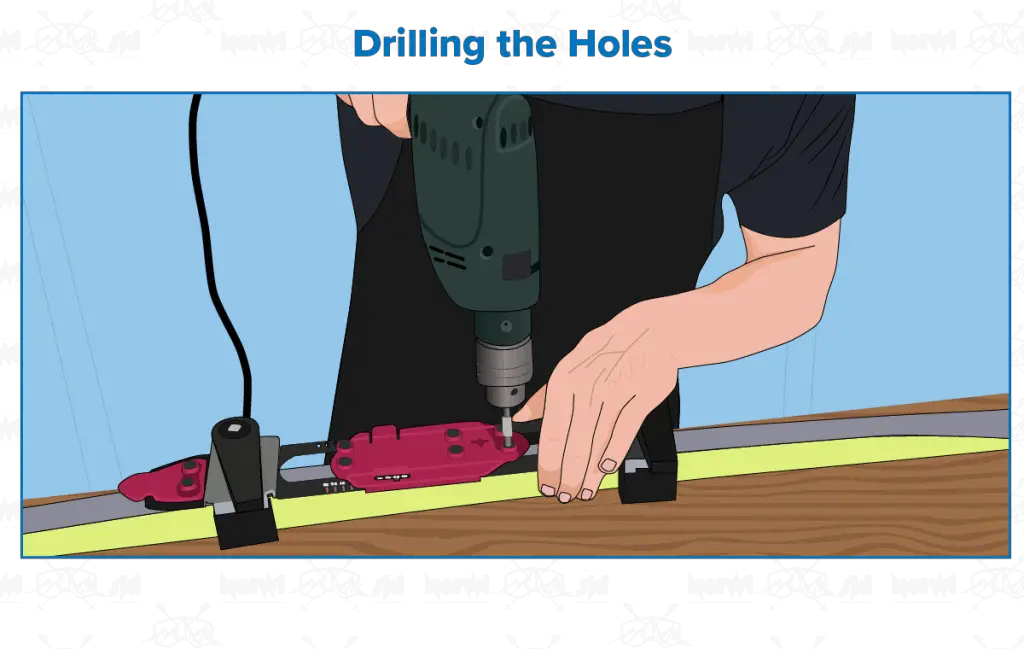
Drilling the Holes
The next step is to drill the first three holes present on your mounting jig with caution and then using the actual binding to drill the other holes accordingly. Make sure every single hole on the mounting jig aligns with your binding.
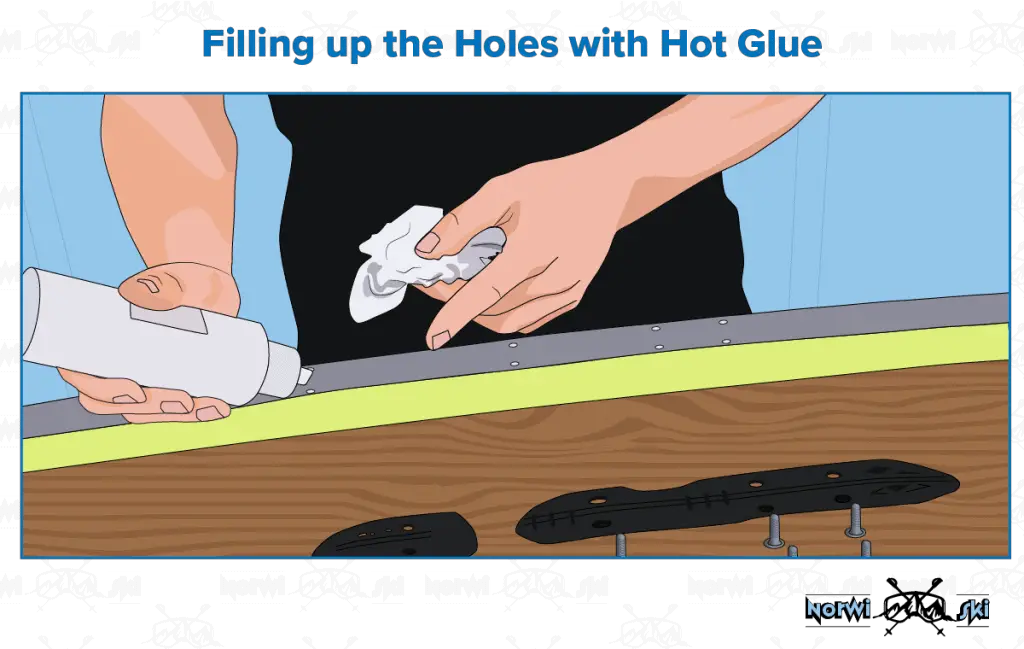
Filling up the Holes with Hot Glue
After putting the mounting jig away, fill up all the drilled holes with hot glue before proceeding to the next step.
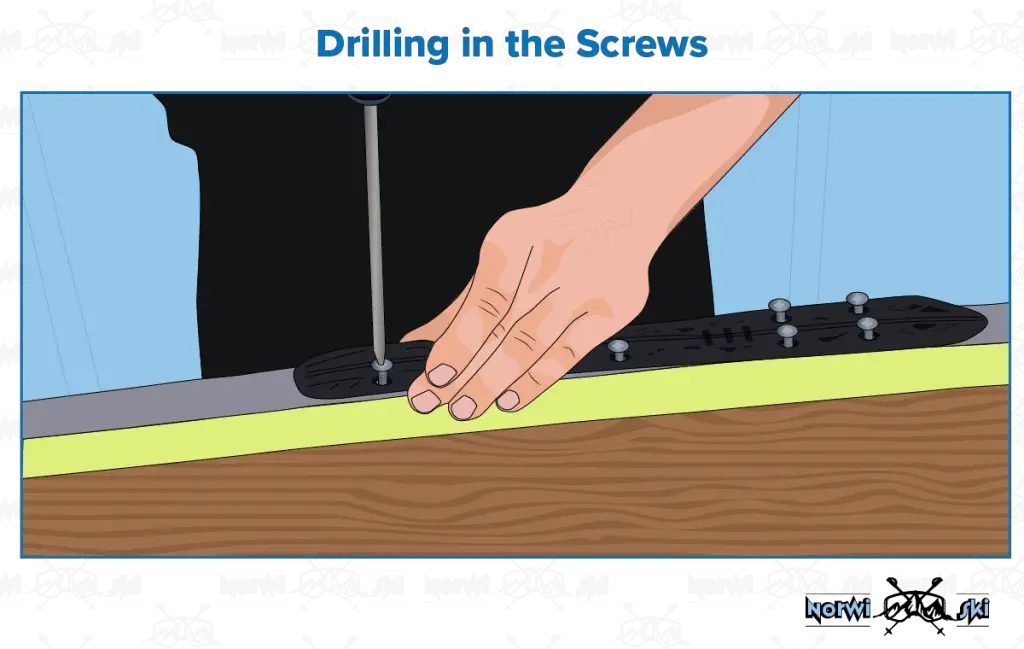
Drilling in the Screws
Place your binding with the placement of the holes and gently drill in the screws. It is advised to tighten all the screws with a screwdriver once you are done with the drilling procedure. Place your skis upside down so that the glue dries as quickly as possible.
How to Remove Cross-Country Ski Bindings?
Removing different kinds of cross-country ski bindings is fairly easy once you get the hang of it. To ease the worries of beginner skiers, we have listed all the methods to safely remove different kinds of bindings all on your own.
Salomon Bindings (SNS) come with a button to activate them. You can either activate it by pushing it with your fingers or your ski boots. To remove Salomon automatic bindings, you must carefully remove all the visible screws with the help of a screwdriver first. Next, push in the button with one hand and use a slot hand screwdriver to gently insert it inside the slot hidden beneath the button. Rotate your screwdriver to unhinge the cover of the button and reveal a button alongside the three other buttons present on the sides. Remove all the screws with caution, and you are good to go.
NNN Auto bindings hide two screws underneath the rubber Flexer and one beneath the cover of the given button. Unhinge the screw present on the plates and simply use a screwdriver for popping off the cover of your button to reveal another screw. The rubber flexer hides two screws beneath it. Remove the screws one by one, and you are all set.
The three-pin/75 mm binding is probably the simplest kind of binding since all the screws are present in plain sight and visible to the eye. All you have to do is locate the positions of the screws and remove them with a screwdriver.
Conclusion
Cross-country bindings have been designed to provide the most comfortable and user-friendly experience to not only professional skiers but beginner skiers as well. For years, manufacturers and developers have been trying to come up with bindings that will lower the possibility of accidents occurring due to the binding system not working properly. Cross-country bindings are some of the top-quality ski system bindings that not only work smoothly but also provide a high-quality experience to the user.
You do not have to empty your pockets on the maintenance of your already very expensive ski kit whenever the snow season arrives since cross-country bindings do not require much of your attention and money. All you have to do is check for your occasional wear and tear before using them and make sure that they are free of debris.
Mastering how to mount your cross-country bindings all on your own is bound to rid you of all the worries related to the expense of getting it mounted through someone else. You do not have to worry about emptying your pockets every winter season. However, treading with caution is highly advised since you are dealing with your ski all on your own. Mark, measure, and recheck everything before you proceed with any of the steps listed above.