Table of Contents
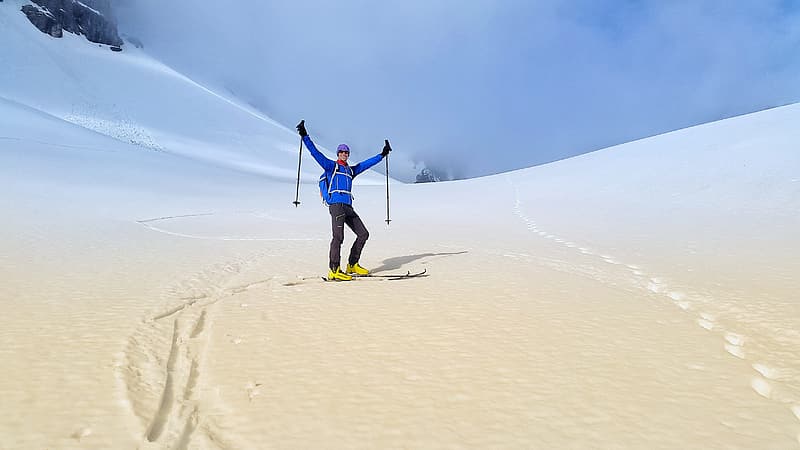
Backcountry snowboarding and skiing is an experience like no other, especially for people who love the quiet solitude of the backcountry and the excitement of breaking your own trail. With ski touring getting incredibly popular, you might hear about it at every corner and still not know what you are getting into.
Before you go ahead and say yes to your friends making a backcountry skiing plan, you need to learn more about it. You need to be prepared about the level of commitment it requires and the things you should know like the back of your hand. In order to help you understand and prepare for your ski tour, we have compiled a guide down below.
What is Backcountry Skiing?
Skiing may seemingly involve a pair of boards strapped around your feet while you glide across snowy slopes. However, it is far more than that and skiing itself is categorized according to various aspects. Take a look at backcountry skiing: it refers not to a style of skiing, but to the place where the skiing is being done: in the backcountry. There is a whole world beyond the confines of designated ski areas. Let’s explore it!
Backcountry skiing (also known as off-piste skiing) is a type of skiing that is done in the unpatrolled and ungroomed wilderness that is outside designated ski areas. It can be performed in various styles from cross-country skiing, alpine touring, freestyle skiing or even snowboarding, but the harsh conditions require a different set of equipment, as well as skills and techniques compared to their on-resort counterparts.
Cross-Country Backcountry Skiing 101
In the following we focus on the cross-country style backcountry skiing, which is actually the closest relative of the original style of skiing rooted in Scandinavia thousands of years ago. As the name suggests, it was mainly used as a mode of traversing through the untracked winter landscape, no matter if it was flat, rolling or mountainous.
One distinguishing mark of backcountry skiing is the fact that it combines elements of various skiing styles which today are considered separate sports on their own right. Therefore, backcountry skiers apply cross-country skiing techniques in a number of situations, as well as elements of alpine touring and even telemark skiing.
Essential Backcountry Gear
The deep, untracked snow and the varying terrain require a unique set of equipment. Besides the regular ski/binding/boot combo, the extreme situations a single backcountry trip can involve necessitate that you prepare for the worst. For this reason, backcountry skiers must always bring a special set of avalanche safety equipment with them. More on that later!
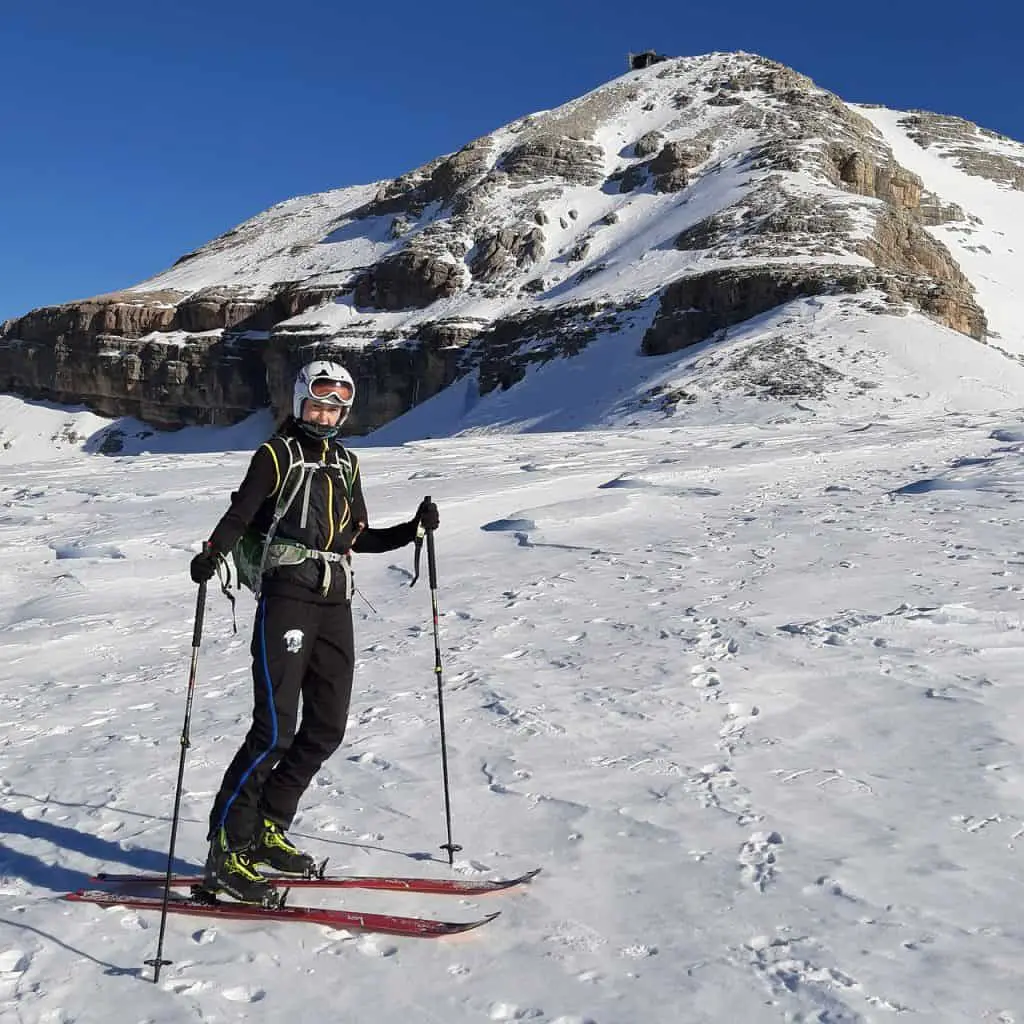
Cross-Country Backcountry Skis
While there are numerous types of skis that are suitable even for backcountry conditions (with the adequate backcountry tech bindings), but if you take into account that backcountry tours are generally longer, and they take you through often extreme, sometimes technical terrain that involve both downhill gliding and hiking uphill with a heavy backpack on your shoulders, you realize that your usual on-resort set of skis won’t be perfect. Some even venture out with their alpine skis or light-touring cross-country skis, but the problem is that while downhill skis are too heavy for climbing, touring cross-country skis are too light and narrow, and also lack the metal edges that are crucial for easier turns and generally better control.
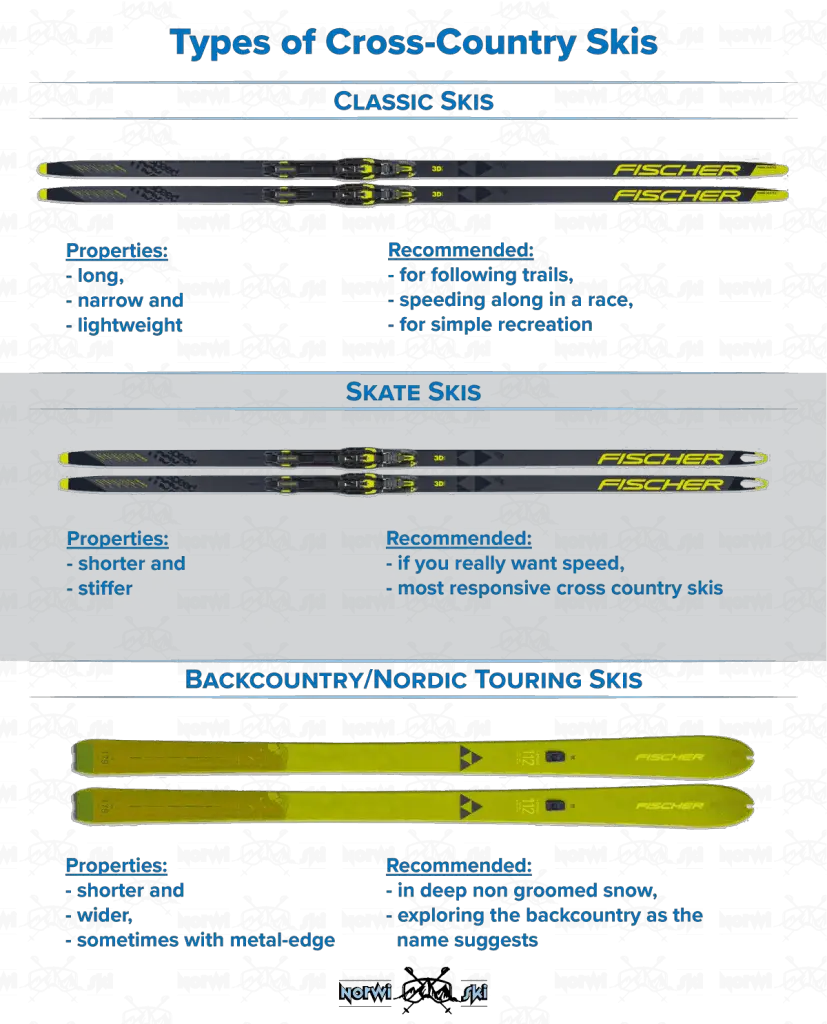
The middle ground lies with metal edged cross-country backcountry skis, also called Nordic touring skis. These are wider for a better floating on deep snow, shorter than classic cross-country skis for easier turning and maneuvering, while also lighter than alpine skis for easier uphill travel. And of course, the metal edges that are essential for easier climbing and overall control, while they also make the construction much more durable.
Backcountry Ski Touring Bindings
The reason why regular alpine skis cannot work for backcountry skiing is that you need to be able to move your heels! Cross-country and backcountry skis (as well as AT alpine touring skis) will let you do that. Bindings connect your boots to the skis, and therefore they are essential for control.
Backcountry cross-country skis are usually compatible with three types of touring bindings:
- 3-Pin, also called Rottefella or 75mm binding
- NNN-BC
- SNS-XA
You can mount any of these to any wide-enough cross-country ski, but remember, that the binding must be compatible with the boots. Three pin bindings go with traditional three-pin boots, NNN-BC bindings with NNN-BC boots, and as you would expect, Salomons’ SNS XA bindings go with SNS XA boots.
Backcountry Ski Boots
Purpose-built backcountry ski boots are made with similar design in mind as backcountry skis themselves: There are a number of types available and each of them is part of a separate discipline on its own right. However, our focus is primarily on the most versatile type that is the common denominator of all these disciplines from alpine touring to cross-country skiing: cross-country backcountry ski boots.
These XC BC ski boots are considerably more flexible, while its sturdier, heavier construction also provides more support for the shank and the ankle than classic or skate boots. They resemble more to hiking shoes and less like running shoes. Backcountry boots will give you warmth and a higher level of protection against the elements. Waterproof insulation is almost obligatory, but some of them even feature built-in ankle gaiters. As for the material, the most common are synthetic fabrics and leather.
Although we prefer leather over synthetics in almost all cases, but the deep snow and extreme conditions make synthetics the overall winner in a technical sport like backcountry skiings. Tip: Always choose your ski boots first, then the bindings!
Backcountry Ski Poles
Choosing poles for a backcountry ski tour is really up to one’s own style and taste. Many backcountry skiers prefer their standard alpine skiing poles that are fixed in length, however we highly recommend having adjustable, telescopic poles which feature will come handy on the mountain.
Compared to long skate but even classic cross-country ski poles, you will generally need a shorter pair of poles with bigger baskets. These bigger baskets will accommodate your floating experience even in deep and fresh snow, while the shorter poles will not get in your way when you have to swiftly react to any unexpected circumstance or varying snow conditions.
Adjustable poles are even more convenient if you are preparing for a varied terrain, since uphill climbing requires longer poles, while downhill gliding is easier with shorter ones.
Climbing Skins
Not to be confused with skin skis and their replaceable skins, but similar. Climbing skins are designed and used specifically for climbing uphill by providing remarkable traction, while not allowing your skis to slide backwards. Backcountry skiers stick these to the bottom of the skis right at the foot of the hill, then detach on top.
These skins are reusable, and unlike cross-country ski skins, they are not designed for its ability to glide and grip. Their one and only purpose is to get you on top of the hill in an easier and more energy efficient way than taking on snowshoes. Climbing skins are made of similar materials as cross-country ski skins: synthetic fabrics like nylon and mohair (angora goat hair). Both are excellent, durable choices.
How to Dress for Backcountry Ski Touring?
Layer up! Alpine skiers usually go for “the more, the better” approach, since gliding downhill and taking a chairlift uphill is far from exhausting. Being a full-body workout, cross-country skiers are closer to the solution. Smart layering is the key, and cross-country skiers apply the same three-layers method on a daily basis.
Regardless of the style you ski, in the backcountry you must exert yourself tremendously to climb uphill, but even on a flat terrain. Your body will soon start generating heat, therefore you will sweat. Just as you stop to relax, the cold, freezing temperatures will turn your soaked clothes to a damp and cold hell. For this reason, you need just enough layers to keep your warm during the downhill fun, but cool and breathable when you are climbing and exerting lots of energy.
Layering Clothes
You start out with a base layer. Its job is to keep moisture off your skin, by wicking sweat and perspiration. The base layer needs to be a breathable, stretchy and comfortable fabric, being in direct contact with your skin. You have two options and one warnings. Let’s start with the latter: Never wear cotton! Cotton does the opposite to what your base layer should perform. What you should do is choose a technical, synthetic fabric designed for the purpose or merino wool.
The mid layer provides insulation. Its purpose is to keep you warm even if you are just standing around looking at the view. It also need to comply with the same breathability as the base layer, but in certain situations you might even think of taking it off – rightfully. If you are climbing uphill and it’s not extremely cold, it might be just too much for taking on a mountain. That’s the point of the three-layer system. Most mid layer clothes are made of state-of-the-art technical fabrics allowing breathability while also keeping the warmth generated by your body.
The final layer is the outer shell which should protect you from the elements. Since the point is still to keep your just warm enough, a soft shell jacket should work fine in most circumstances. Your main enemies are snow and wind, and while hard shell jackets provide the utmost in terms of protection, they do more harm than good if it comes to breathability and temperature regulation. For this reason, we only recommend you to pack an additional hard shell jacket if you plan to stay for the night or if forecasts expect uncertain to worse conditions.
The Most Critical Apparel
Socks. A pair of often underrated sportswear. Actually, socks should be considered as part of the base layer, and the same criteria needs to be met: moisture wicking ability, breathability, while also providing warmth and comfort. Synthetic fabrics and merino wool are the top options again, and if you really take care, buy socks with extra foot padding. N.b. Always pack an extra pair!
Your lower outer layer is your pants. It has to protect you the same way as the upper mid layer does, by insulating and keeping your body warm but breathing. Soft shell pants do well for backcountry skiing too, since they have a windproof layer in the front, and breathable in the back, while some also have a degree of water resistance. The most important is that you are comfortable in it, doesn’t limit your movements. The best models feature extra stretchy material and padding around the knees, and flat seams will make sure that the pants and seams won’t irritate your skin.
If your ski boots or pants doesn’t have ankle set-up gaiters, you must definitely get a pair of these. Attached to your pants, it makes sure that snow cannot get into your boots, and there are a number of situations when this particular accessory will come handy.
List of Accessories for Backcountry Skiing
- Gloves
- Hat or beanie
- Neck-gaiter
- Sunglasses or goggles
- Navigation tool
- Waxes and waxing tools
- Food and water
- Energy bars
- Sunscreen
- Headlamp and extra batteries
- Avalanche Safety Kit
- First-Aid Kit
- Personal Hygiene Items
- Survival Kit with fire starting tools
- Emergency Shelter

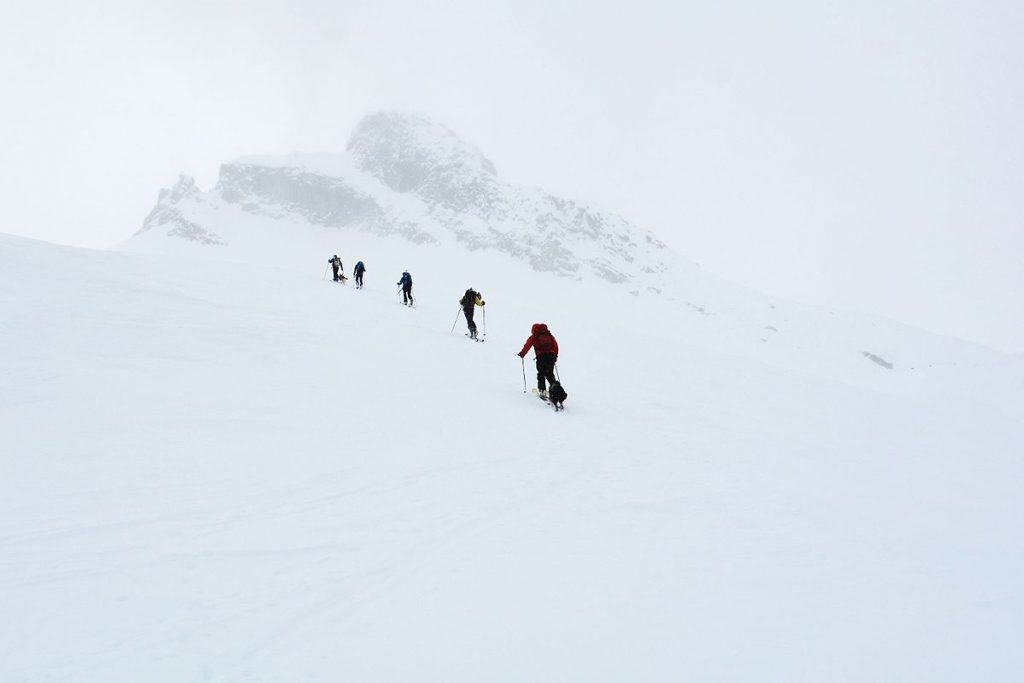
Preparations for Backcountry Ski Touring
The biggest and first responsibility you have to yourself and your partners is to get the right kind of backcountry ski education before going out to the backcountry. The most recognized and easiest way to do that is by taking a course known as Avalanche Safety Course and is commonly referred to as AST Level 1. In this course, you learn how to use your avalanche gear, techniques for rescuing, and how to use your ski touring gear and equipment.
Assess Your Skill Level
It is also a good idea to take a step back and consider how good you can ski at the resort before you go into the backcountry. It is recommended that you must be able to easily navigate down the intermediate (blue square) runs at a resort before you go try backcountry skiing.
If you need to work more on your skills, then you can take lessons at a ski resort present in your vicinity. Compared to the resort, where the trails are built purposefully, and the trails are groomed, the backcountry is a wild and undisturbed place. Snow conditions can go from being a perfect powder to getting wet and incredibly heavy, and sometimes this happens in a time span of a single day.
Furthermore, trails in the backcountry have no marked slopes, and it is up to you to find the right way through the trees, over and around the cliffs, down the chutes, and across different flat sections. On top of this, you also need to be comfortable when going uphill, which involves using the touring bindings, performing kick turns uphill, and putting on climbing skins.
Lessons
Another thing to do before you head on for backcountry skiing is to opt for a class specific to touring the backcountry. In this class, you will learn how to snowboard and backcountry ski under the guide of an experienced and trained professional instead of stumbling and learning it on your own. This is very important to do so and allows you a good grasp on skiing in the rugged snow.
Avalanche Awareness Class
Avalanches are a real danger to all backcountry travelers in the winter. If you want to ski in the backcountry, then you need to enroll in avalanche safety training right away. This training is crucial for safe skiing, and the training must be conducted by professionals.
To get started, you must first look for the best avalanche awareness course present. They are usually free in many locations, and include an introduction to avalanches, why and where they usually occur, and also give you a basic approach to handling them and managing the risk. Many skiers who get caught in an avalanche tend to make things more difficult for themselves by traveling beneath or on top of unstable slopes. For this reason, you will also learn how to assess the local avalanche weather reports and bulletins and recognize the signs before avalanche danger strikes.
The next thing to do is to take a formal avalanche course for training that is provided all across the country. This course helps in teaching the basics of rescuing a companion, how to use a shovel, transceiver, and probe in order to find a buried victim. The level one and level two course of avalanche training teaches you how to make decisions in an avalanche risk area.
Get the Right Avalanche Safety Gear
These courses will also tell you the avalanche gear to carry. Some avalanche protection gear includes a shovel, beacon, and probe. These are also known as the holy trinity of avalanche protection gear, and you must know how to use them.
The beacon helps in emitting a radio signal that other beacons present in the area can catch. So if someone gets stuck under the snow, you can switch the beacon to search mode and find out your partner. A shovel, however, can help in digging through the avalanche debris and climb your way out or help your partner in getting you out of the snow. The last avalanche gear is the probe, which is a long pole that lets you locate a person under the snow and pinpoint their exact location.
With this information, you can learn how to make plans, how to identify avalanche terrain, and make the right decisions according to it.
Ski Conditioning for the Backcountry
Backcountry skiing may be a fun activity for many, but it is no doubt hard. Just as in case of cross-country skiing, the basic elements of backcountry skiing include endurance and strength. This strength is needed to move the weight strapped to your feet, whereas to be able to keep going, you will require endurance.
You do not have to be too strong in order to enjoy ski touring, but you do need decent strength to climb mountains on your feet easily with a little weight on you. You will not only have boots on but five to six feet long pounds attached to you as well via bindings. So the stronger and fitter you are, the easier it’ll be to take another step.
Where to start depends entirely on the shape you are in currently. If you are a complete couch potato, then starting anywhere will be good for you. Walking for fifteen minutes every day or throwing a backpack filled with weight and starting with some resistance training works, too.
However, if you are an exercise enthusiast, then you won’t have to work out too much, and you’re good to go. For more training tips check out our article on how to get ready for cross-country skiing.
Have a Plan!
Another thing to do when you decide to go on backcountry skiing is to make a plan. This planning is very important, and without it, you may end up endangering yourself and your group, let alone have a bad ski experience. You can follow the tips mentioned below to learn the best planning guide for backcountry skiing, and then pack your bags and head out to your destination.
Group together
The first thing to do is to get a group of friends to travel within the backcountry. You cannot go alone for backcountry skiing, and if you have friends who want to go on a backcountry tour and are up for a mellow trip, then you are in luck. Make sure they know you are a beginner so that they can choose a trail more suited to you as well.
However, if you do not have a group to travel well, then reach out to online groups and get people to go with you; going out with a group of experienced and professional skiers allow you to learn a lot. Also, make sure to speak up even if you are a beginner. Just because you are new doesn’t mean you have to rely on the decision of other people. If you feel avalanche danger and nobody else feels that way, you should speak up regardless.

Where to Go Backcountry Skiing?
As alluring as it may be to go on your first tour, it is important to opt for a simple trip to go on. You must choose a trip with easy access, low avalanche risks, and moderate skiing difficulty. On your first backcountry skiing, you will mostly spend time getting used to the new gear, practicing skiing and its skills, and carrying our kick turns.
Being near your car will allow you to bail easily if you come across any gear issues or if you simply get tired. In order to find the right kind of tour to go on, here are some simple tips:
- Guidebooks: There are plenty of books present in the market, and they are a great resource. They will provide you with the essential information you need, such as elevation gain, distance, difficulty, and directions.
- Websites: Similar to guidebooks, there are plenty of websites that allow you to get all the information you need before you plan your trip. These websites also let you know about the current snow conditions where you are headed.
- Word of mouth: This is another great way to find the right kind of tour. If you have friends who tend to go backcountry snowboarding or skiing frequently, then they can suggest some great locations for you.
Check Avalanche Forecasts
Another thing to know about before you head for backcountry skiing is to check avalanche forecasts. Make sure that you do this every time you plan a tour. An avalanche forecast will provide you with a sense of the hazards that may exist under the surface, so you must plan your trip accordingly. For example, if you are aware of great avalanche danger on the slopes facing north, then you can simply avoid the tour that takes you on that route.
You must check the avalanche forecast before you plan the trip and discuss the forecast with your partners and group before heading out.
Maps, Guidebooks, and GPS
Apart from following the above tips, you also need to carry maps, GPS, or guidebooks when traveling. All of these are essential to carry since they allow you to keep track of where you are headed. As a beginner, this is very important to have so that you do not lose track of the planned route and get lost.
Have a Guide
If you have decided to go on backcountry skiing and are taking your first backcountry experience, then hiring a guide is the best piece of advice you can have. Even if you are going with a friend who is experienced or a group of people who are professionals, having a guide is ideal for your backcountry skiing experience.
This will not only allow you to be in the hands of a professional but also make it easy for you to learn from their experience and become better yourself. With an expert, you can follow the safety routes on the trail and go up and down the mountain without any worry.
Be Prepared and General Precautions
Like any outdoor activity and sports, there are plenty of inherent risks that come with backcountry skiing. Hazards lurk in the form of avalanches, shallow objects buried, possible crevasse falls, and glaciers; all of these require full preparation and vigilance and should not be messed around with. If you fail to prepare for your trip properly, then backcountry skiing can be a very dangerous sport. This is why for your first season, you must completely avoid avalanche terrains.
Utilize and learn more from experienced skiers instead of heading on an easy trail by yourself. Put your name up on different backcountry ski groups and forums, stay up to date with the weather conditions of your destination and also take proper avalanche training courses. When in doubt, do not shy away from help and go skiing with a guide.
Guides not only show you the steep lines and best techniques to use, but their main concern is to keep you incredibly safe. Try to gradually enter into backcountry skiing and don’t rush into it. For your first year, make sure that you avoid tricky trails and terrains, read the weather bulletin on a daily basis up to your skiing day, and keep in mind the lessons you have learned throughout the year.
Also, be extremely attentive in the avalanche protection training and use the right gear and technique when going down a trail that may not be very safe. Find yourself a group that has professional skiers and make sure they are aware of the fact that you are a beginner. In order to avoid an avalanche, make sure that you do not go on terrains that are above 25 degrees or connected to slopes higher than it.
Backcountry Skiing Techniques
Perfecting your uphill techniques does wonders for your skiing efficiency. However, there are other techniques you should learn as well, including skiing on flat terrain, downhill techniques, and turning tips and tricks.
Skiing Techniques for Flat Runs
You need to make use of the classic method of kick and glide. As you slide with your foot forward, you can push down using the opposite pole and kick forward lightly with your back foot – this will let you glide. Then you should lightly keep the opposite pole in front of each stride you make and make sure to keep the rhythm even.
When going on gentle downhills, make use of double poling for more efficient skiing and get into a crouch athletic stance while keeping the skis parallel. Then place the poles in front of you at once and push on them with both your arms to make yourself go more forward.
Uphill Skiing Techniques
When going uphill, opt for switchback up on longer slopes instead of trying to power straight on them. Avoid climbing too steeply, and keep in mind that fifteen degrees are where the textured bases usually start to slip. Make sure you put your weight on uphill edges to keep yourself from backsliding.
When going on steep and short uphill stretches, go for the herringbone step. This requires you to duck walk to the top and have your toes pointed out with your weight on the inside edges; form a downward, backward-facing wedge using your skis.
Downhill Skiing Techniques
If you are a beginner learning downhill skiing techniques, then go for a gentle path that is no more than fifteen degrees. Make sure this path is free from rocks, trees, and other kinds of hazards. Lean yourself back slightly to keep the tips from getting under the snow surface and have an athletic stance with your feet apart at shoulder width.
If the slope is steeper, then traverse it in order to keep your speed in control by keeping your weight on uphill edges. You can also opt for the classic technique called snowplow, where you ski in a forward wedge in order to slow yourself down.
Turning Techniques
If you are on gentle terrain, then you can use the step turn. This requires you to pick up your ski and simply put it back down, facing the direction you are trying to go in. However, if you want to turn while going downhill, then you simply have to ease into a snowplow technique (as described above). Place more weight on the ski outside when you turn, move the skis back with one another in a parallel position, and pick your speed up.
Conclusion
Backcountry skiing is still a lot of fun. If you have already explored the groomed terrain of your ski resort, you will find it far more challenging and exciting. The backcountry is an uncontrolled environment. There are no ski patrols, and you cannot always find a lodge in the middle of nowhere. Even when you are a pro at skiing, there are certain dangers for which you need to be constantly aware of when you do backcountry skiing.
All in all, there is a lot of work and effort that goes into backcountry skiing. It is a very thrilling activity, but once you understand the dos and don’ts, it can be fun. You need to get the right gear, learn proper techniques, and take protective avalanche courses before you grab your ski poles and head out.
It is crucial to have the right knowledge and best practices before going off into the unknown weather. With that being said, backcountry skiing and snowboarding are lifetime adventures that everyone should enjoy at least once in their lifetime. So start preparing for this adventure today, and who knows, next year might be the skiing adventure season for you!